Getting started · Feature guide
Create a league
Start with a league name, sport, and location, then configure the season’s operating details.
Screenshots captured October 21, 2026 · Demo workspace
Open the page
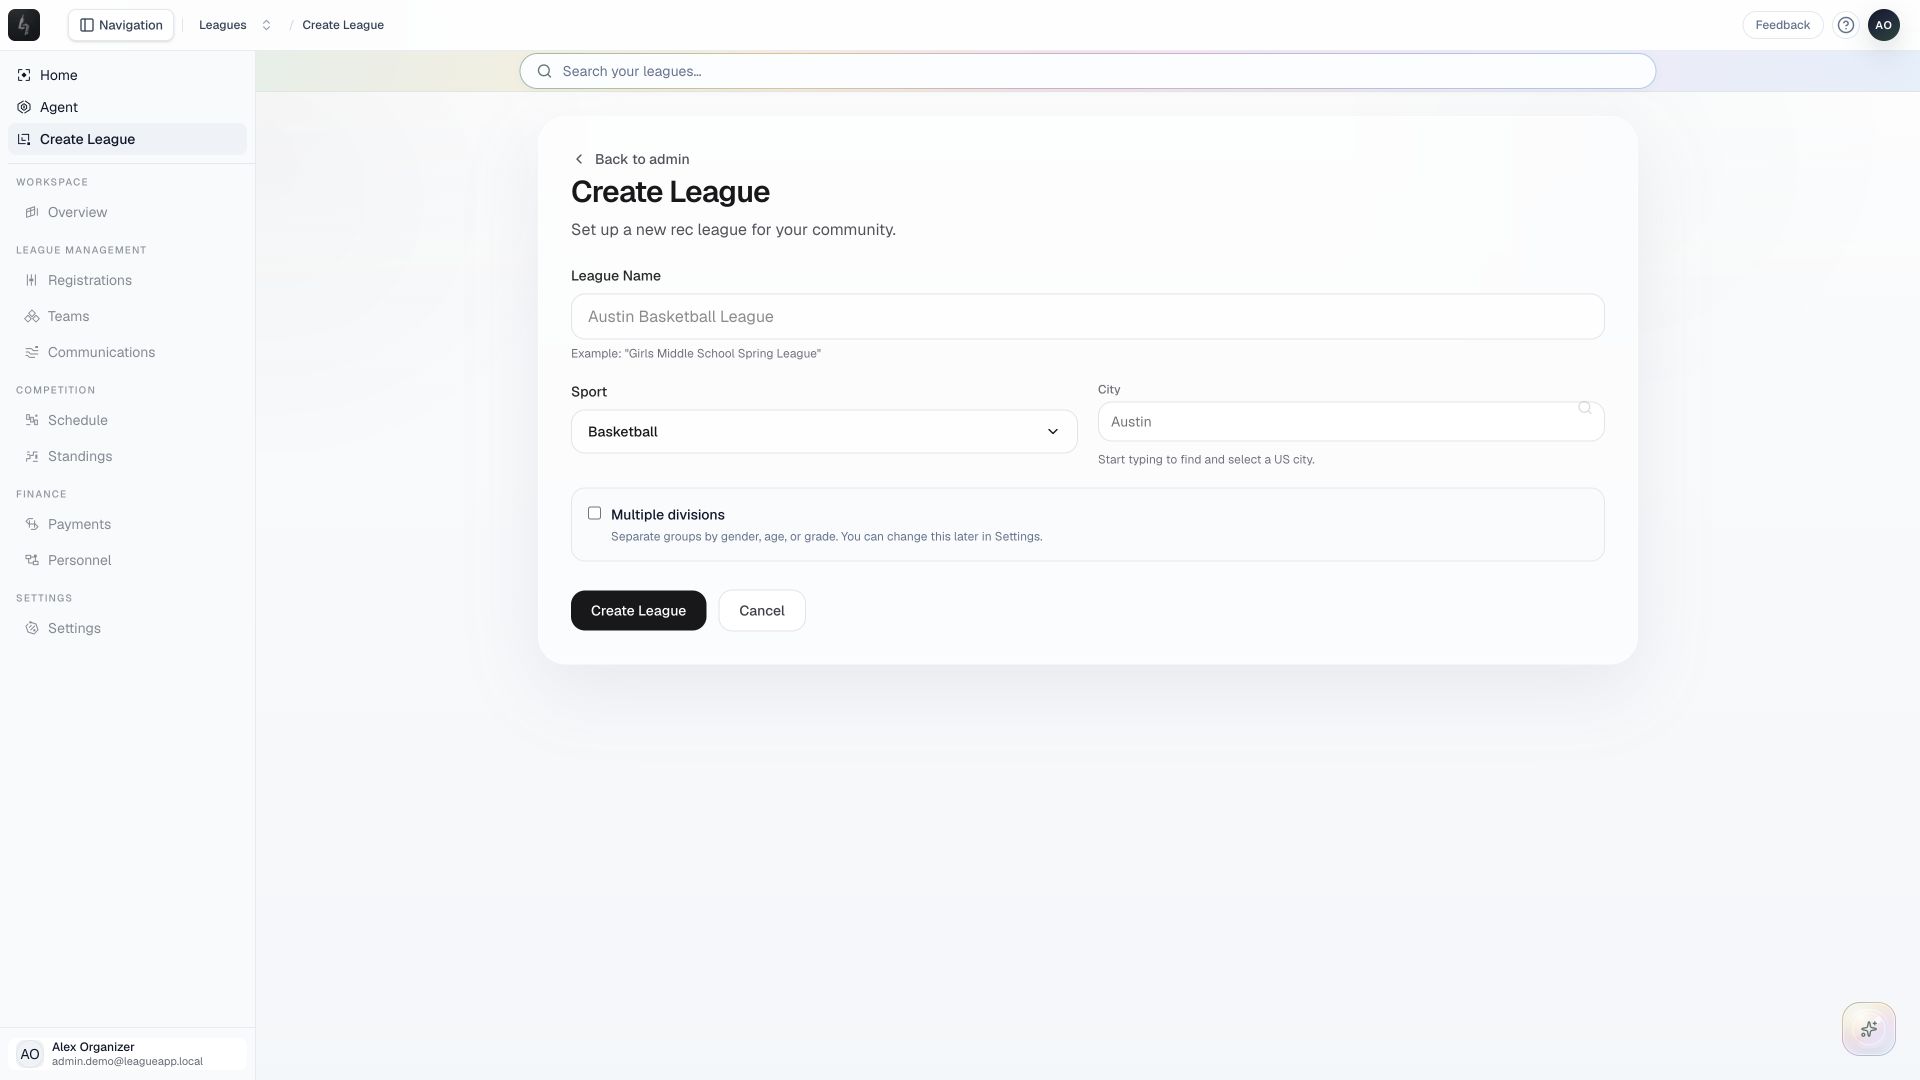
Choose Create League from the organizer sidebar.
In the workspace
How to use it
- Enter a descriptive League Name so staff and players can recognize the program.
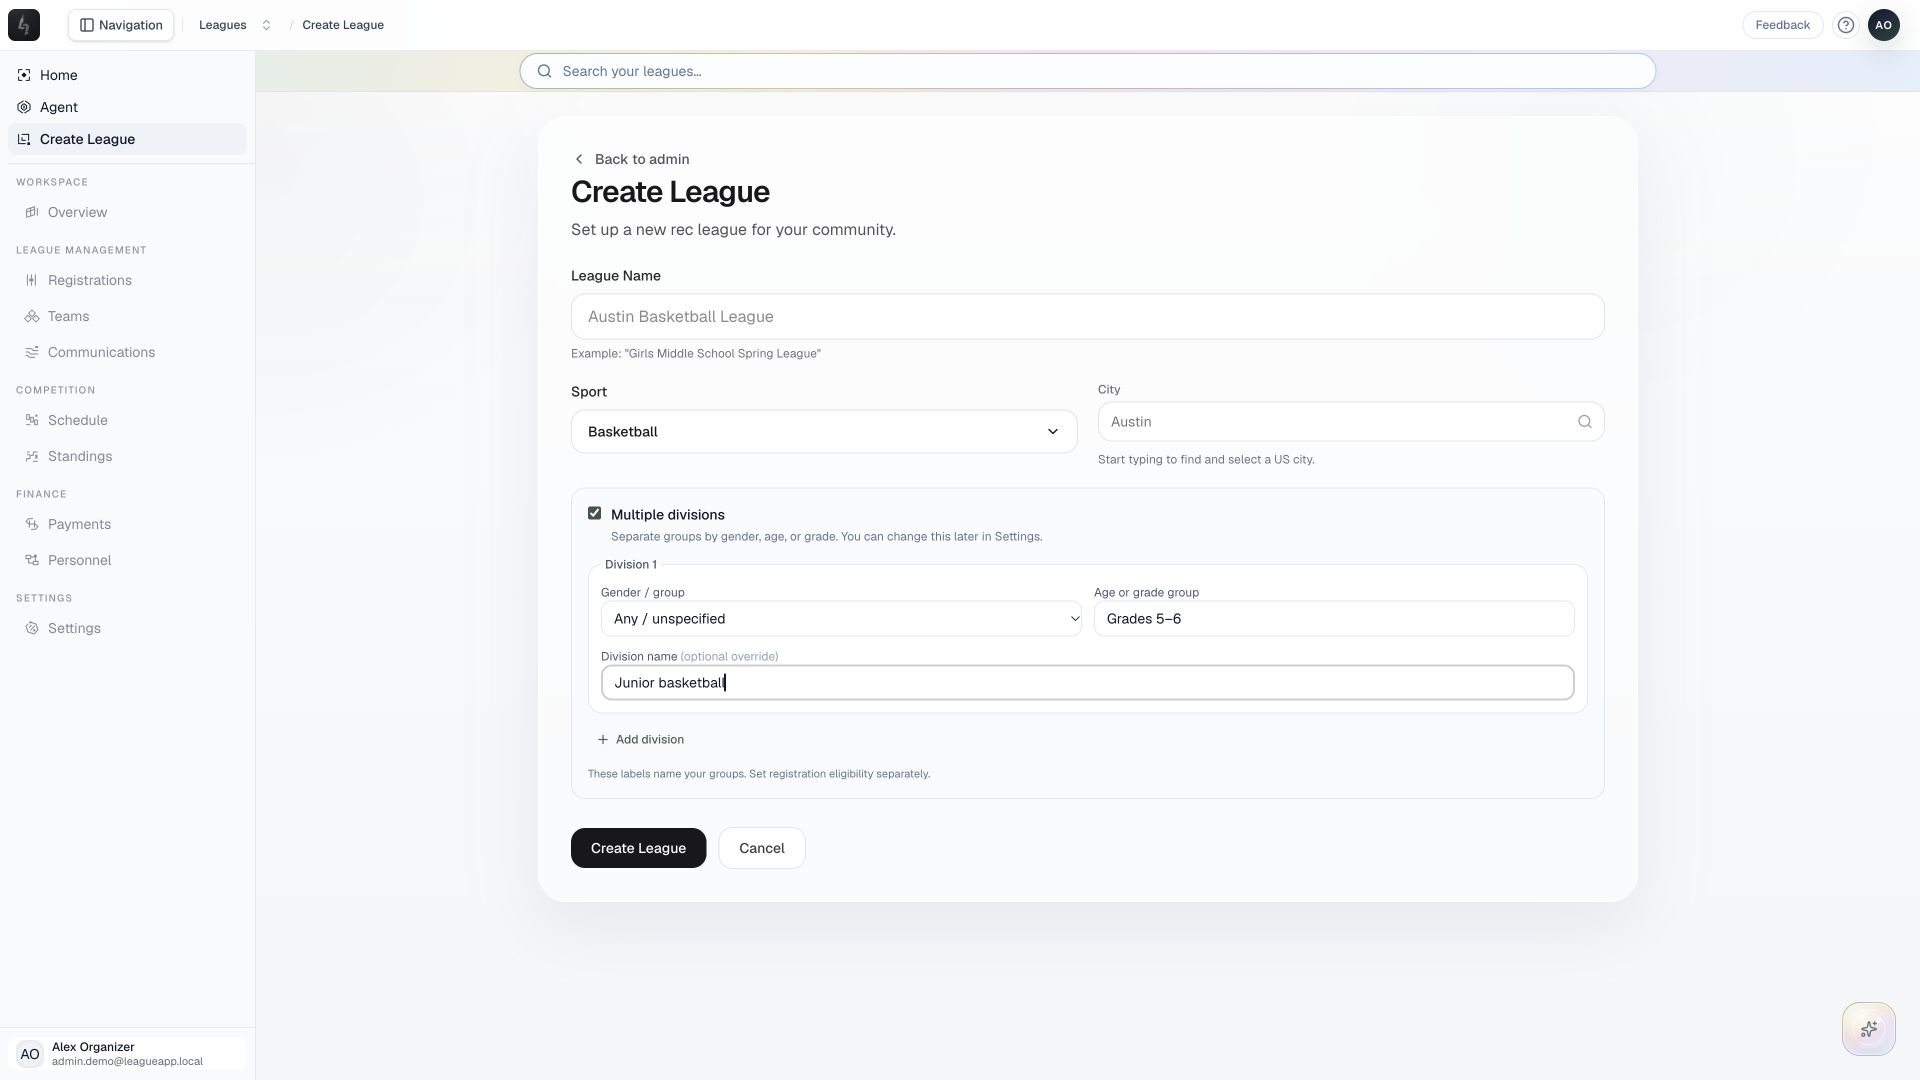
- Choose the sport and search for a US city. Select a city result so its location details are attached to the league.
- Enable Multiple divisions if you need separate groups by gender, age, or grade, and enter the division details.
- Review the form and choose Create League. Continue into the league workspace to configure registration, teams, and the schedule.
Things to check
Registration fees, capacity, eligibility, and locations can be configured after creation. You do not need a full roster to start.
Active league limits depend on the organizer’s plan. If a limit is shown, resolve it before creating another league.